Info
Using the Members Info option, you can get all the details about the selected member -- from their Club Rating, Age, Active Player status to Gender, Notes and more.
You can also change the selected user’s details, add Notes, User Tags from the Info section as well.

Add Member Notes
Member/user notes are the notes, user-identifiable notes you can write about a club member.
These notes can help you better understand more about the specific member.
You can add user delete a club member permanently from the club’s list of members. Note that, once deleted permanently, the club member and all of their records will be removed from the Club’s database.
Deleted members can NOT be added to the club’s members list again.
To add user notes for a club member, navigate through Organizations > Members > Club Members > Actions > Info:
- In the General section, go to Notes.
- Enter the notes you want to write about the member.
- Click on Save to save the entered note.
- Once saved successfully, you’ll get a success message about the Member info being updated successfully.
User notes are visible only to you – the club manager/admin.
Adding User Tags
Members of your club can also be given certain tags which can help better identify them depending on their league, games, championships, special case, etc.
You can see these tags on a member in the Members section under the Tags column. If a member is given a user tag, it will be visible under the Tags column, else, the column will remain empty.
These user tags can be created and edited in the Organization > Tags section.
The given User Tags can also help you better differentiate the members depending on their tags.
To add user tags for a club member, navigate through Organizations > Members > Club Members > Actions > Info:
-
In the General section, go to User Tags.
-
Click on the Add Tag button. It’ll open selection options of all the available user tags.
-
Click on the Select dropdown option and select the tag you want for the specific user.

-
Once selected, it’ll appear on the space below the selection.
-
You can add multiple user tags for one user.
-
Once the tags are added, click on the Save button to save the newly changed details.
-
On successful save, you’ll get a success message about the Member tags being updated.
User Tags are visible only to you – the club manager/admin.
Removing User Tags
If the selected user does not fall under the previously-added tags, you can remove them from the User Tags section.
To remove the user tags for a club member, navigate through Organizations > Members > Club Members > Actions > Info:
-
In the General section, go to User Tags.
-
All the member’s user tags will be available in the User Tags section.

-
Click on the cross (x) icon besides the selected user tag to remove the specific user tag. You can remove multiple user tags by clicking on the specific crosses(x).
-
Once done, click on the Save button to save the newly changed details.
-
On successful save, you’ll get a success message about the Member tags being updated.
Edit Member Overrides
Member overrides gives you the option to change certain details about the selected user.
You can edit/change your member’s names, add Name Suffix, Email, etc. using Edit Overrides.
To use the Edit Overrides feature, navigate through Organizations > Members > Club Members > Actions > Info:
-
In the General section, scroll down to find the Edit Overrides option.
-
Click on the Edit Overrides button. It’ll open a side-panel where you can edit your member’s name and details.
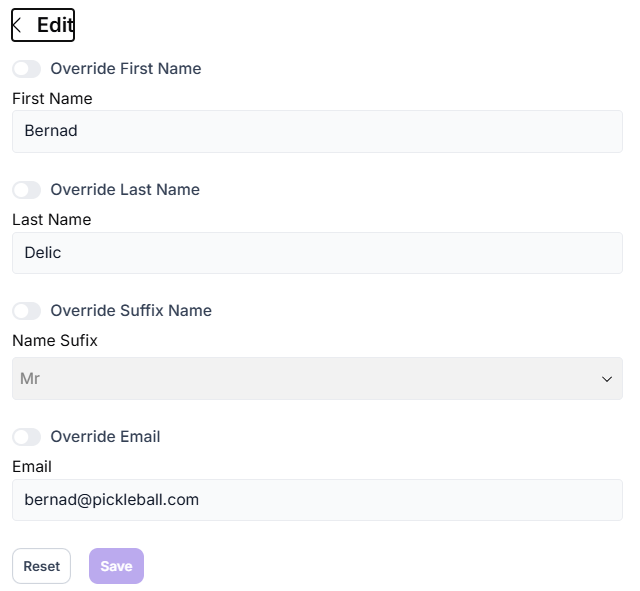
-
In the Edit side-panel, you’ll get these options – First Name, Last Name, Name Suffix, Email. On top of each of these options, you’ll get an Override radio button. (By default, these member sections will be locked/un-editable).
-
To override the member’s details, click on the radio button for the specific member detail you want to override/change – Override First Name, Override Last Name, Override Name Suffix, Override Email.
-
Once clicked, the specific member detail section will be open to editing.
-
Enter the new member details.
-
Click on the Save button to save the member override.
-
On successful save, you’ll get a success message about the Member info being updated.
Edit Member's ID
Each club member has a unique ID that helps to distinguish them from other club members.
As a club admin/manager, you can edit and set a custom Member ID for the selected member.
To edit the member ID, navigate through Organizations > Members > Club Members > Actions > Info:
-
In the General section, scroll down to find the Member # option - its the member ID.

-
Click on the section displaying the member's ID to make it editable. By default, it'll have a default member ID assigned when creating the member.
-
Once editable, you can set the Member ID of choice, then, click on Save to save the new Member ID. On successful save, you’ll get a success message about the Member info being updated, the new changes will appear in the member's info section.
-
Member ID should be up to 15 characters (only numbers, letters and special symbols allowed).
-
Two member IDs can't be the same.
Reset Unsaved Changes
If you are not satisfied with the changes made or you want to redo the changes from the beginning, you can reset the changes made in that session.
Note that, to reset the changes in a session, you shouldn’t save the changes.
To reset the changes made to the member’s General Info, navigate through Organizations > Members > Club Members > Info > General:
- Scroll down to the bottom of the page.
- Click on the Reset button to reset the changes made. Once clicked, it will revert the changes made by you in that session.
Saving the changes will prevent it from resetting.
Add Member’s Proof of Residency
You can add the Proof of Residency of the members which confirms the member’s residency, region, state, country, etc.
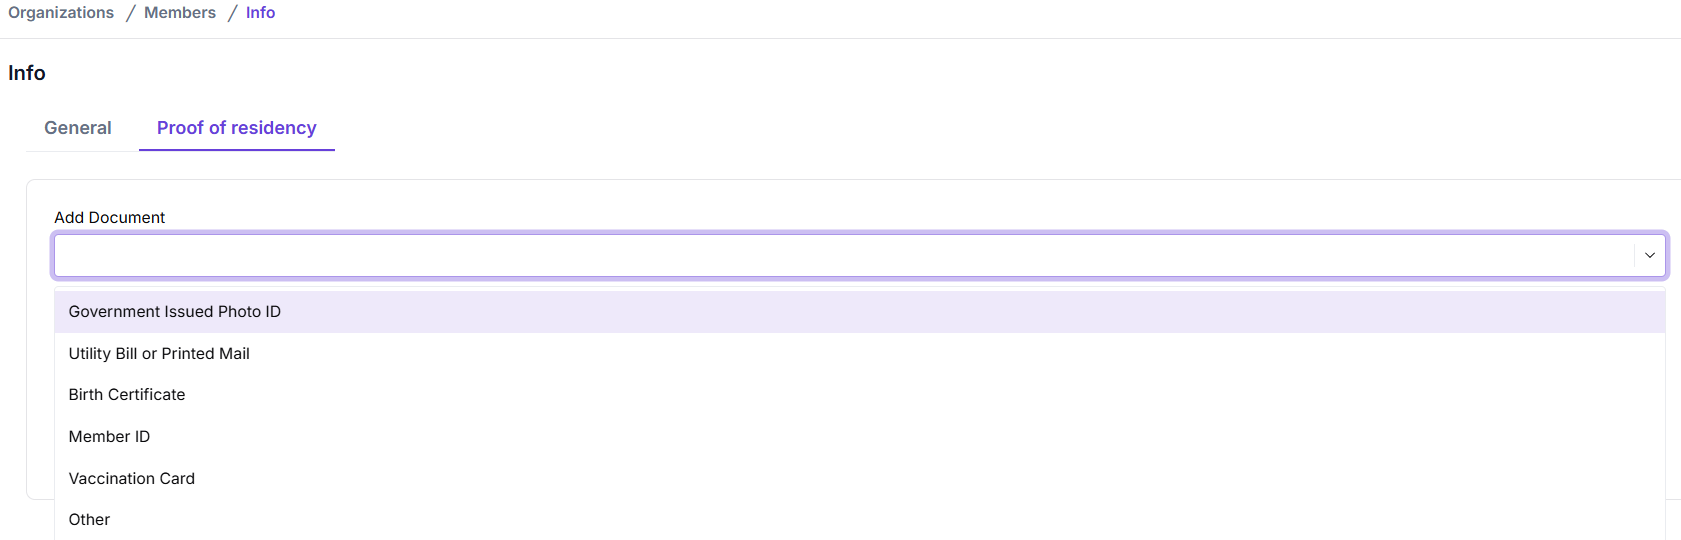
To add a member’s Proof of Residency, navigate through Organizations > Members > Club Members > Actions > Info:
-
In the Proof of Residency section, select the member’s document to upload from the dropdown in the Add Document section.
-
Once selected, click the Click to Upload option to upload the member’s Proof of Residency.
-
Select the Image to be uploaded from your device.
-
Edit/Crop the image to desired size, click on Done.
-
Click the Save button to save the member’s Proof of Residency image.
You can only upload PDF, SVG, PNG, or JPG files to member’s Proof of Residency.